Saturday, January 4, 2014

Lee Valley Monroe Style Table Hockey Game

Whenever I went to my aunts and uncles houses as a kid the thing I always enjoyed was playing with the old games they had. I'm thirty six and my Dad was the youngest in his family so some of his brothers and sisters had kids that were 20 years older. This meant a lot of vintage games. This Christmas I decided to start a new tradition for my kids. I would build a vintage game for them each Christmas. The plan is to keep them hidden for most of the year and bring them out around Christmas time so they can rediscover them each year.
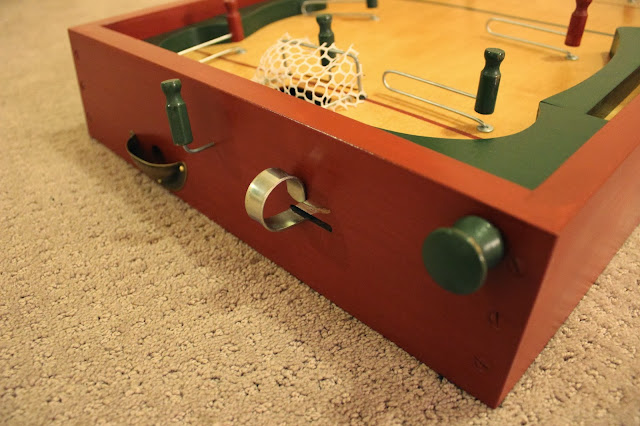
The first project was somewhat complicated but comes as a kit from Lee Valley. It's based on a table hockey game by Monroe and this particular version dates to about the 1950's. The instructions were fairly complete but could definitely have benefitted from a few more pictures which is why I've included multiple views of the finished project in this posting. I searched online and there weren't very many images to be found so hopefully this post helps someone in the future. (Feel free to point out anything I might have gotten incorrect.)

I kept to the plan for the most part however I made the sides a bit beefier. I want this to last a long time. The finish is milk paint and shellac.

The kids really enjoyed playing with it this year and when they seemed done I tucked it away under a bed for us to find again next year.


A Reborn Kitchen Table


This kitchen table originally belonged to my in-laws. They used it for several years and then my wife started using it in her classroom. The top and apron were all particle board so needless to say, several years of students sitting on it left it in bad shape. Most people would have thrown it out after the first leg fell off however, despite it's failings the legs were solid wood and deserved a second chance. I decided I would give it a new life by replacing the top and aprons and improving on the construction.

The legs were previously attached with particle board corner braces and bolts into the legs. This made it easy to disassemble but also made for a very weak joint. I improved on things by adding poplar aprons mortised into the legs and included a corner brace to keep things square. The top was a half sheet of oak plywood from the discard pile at the local home centre edged with 3/4" solid oak. The finish on the top was a fumed oak die with a wipe on poly. A can of white spray paint was all that was required for the base.

For now it's being used to house my daughter's Lego Friends Heart Lake City but it could easily convert back to a kitchen table when she's done.


A Few Quick Projects

Although I enjoy the complexity of putting together larger pieces of furniture sometimes it's nice to do smaller projects just so you can leave the shop saying you've finished something. These projects all fit the bill. The first is a wooden mallet. I've always wanted one but didn't want to pay for it. I wanted to make it. (Let's ignore that it took about $1500 of turning equipment to get the point where I could make it.) It's a simple design from a recent article of Fine Woodworking. Wood is white oak and the finish is boiled linseed oil. This was my first turning project and was done in a single session.
My next turning project was to create a magic wand for my daughter she was going to be Hermoine from Harry Potter for Halloween. A somewhat more complicated project than I anticipated since I don't have any equipment for skinny turnings. I kept this one simple but have since started adding a more defined handle to them. Boiled linseed oil and shellac for this one.

The final project was a clipboard for my wife who is a teacher. I purchased the hardware at Lee Valley and the quilted maple came from my cousin. I believe he got it from a neighbours firewood pile. The wood down the centre is walnut. Boiled linseed oil and shellac for this one. I was amazed that I could get two coats of oil and four coats of shellac on in a single day. If I had to list one lesson for new woodworkers it's to avoid the fancy one function tools, finishes etc. and try the traditional aspects of woodworking first as there are definitely good reasons they were used for so many years.